Storyboardを使ったUITableView
Storyboardを使ったUITableView
なるべくコードを書かずにStoryboardでTableViewが表現されてるソースを見た時、少しハマったのでメモ。
セルがカスタマイズされたテーブルの表示の作成の流れを確認。
まずは、通常通りSingleViewApplicationの作成。
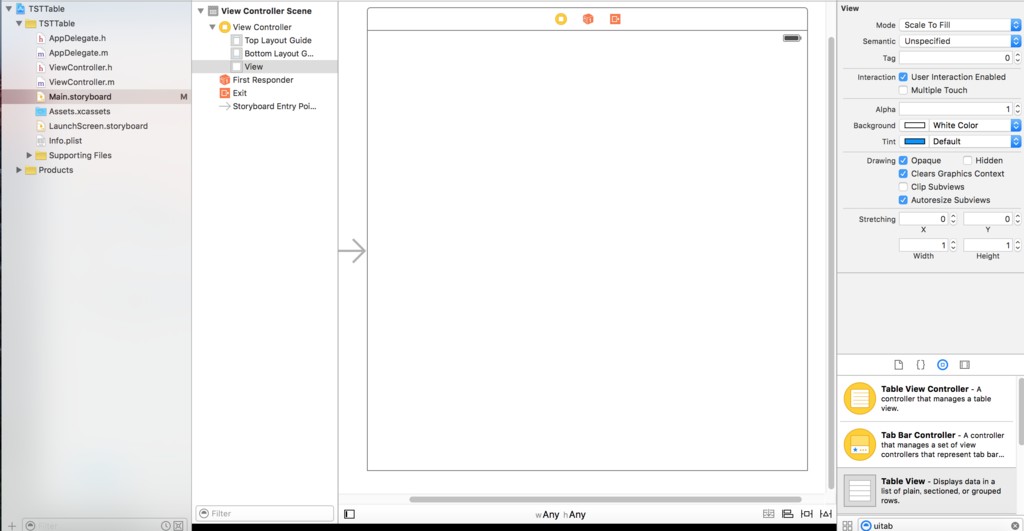
UITableViewの設置

UITableViewCellの設置
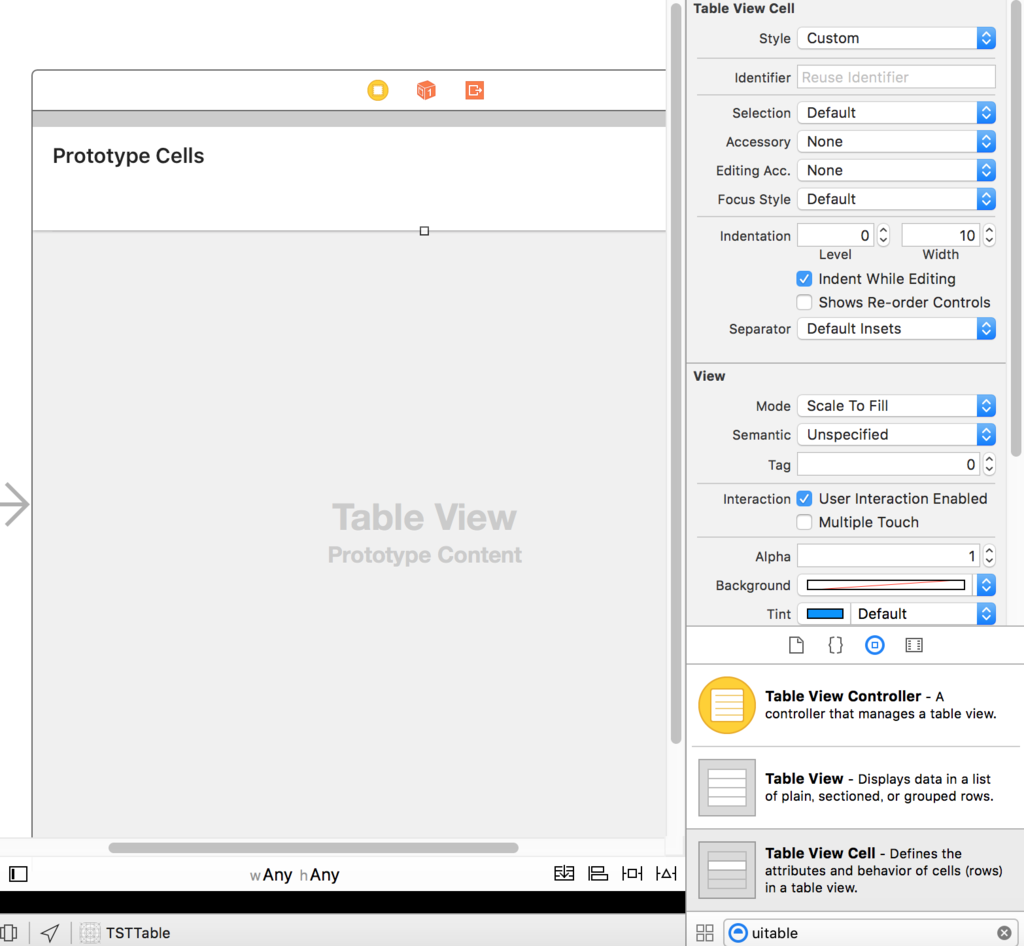
設置しただけではセルは反映されません。(わかりやすくするためセルの色を変えてます)
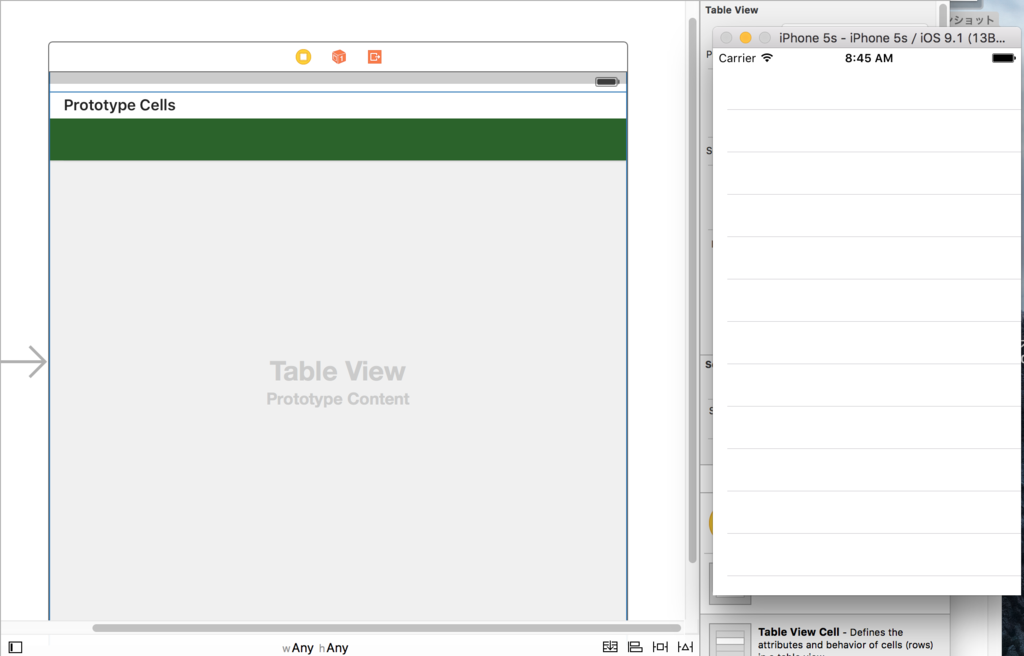
いつものUITableViewのDelegate等の設定を行うのですが、viewDidLoadではなく、Storyboard上から設定したいと思います。

ここにDelegateとDataSourceの設定項目があります。
うまく撮影できなかったのですが、DelegateとDataSourceからControl + Drugで黄色アイコンに向かって接続しViewControllerに結びつけます。
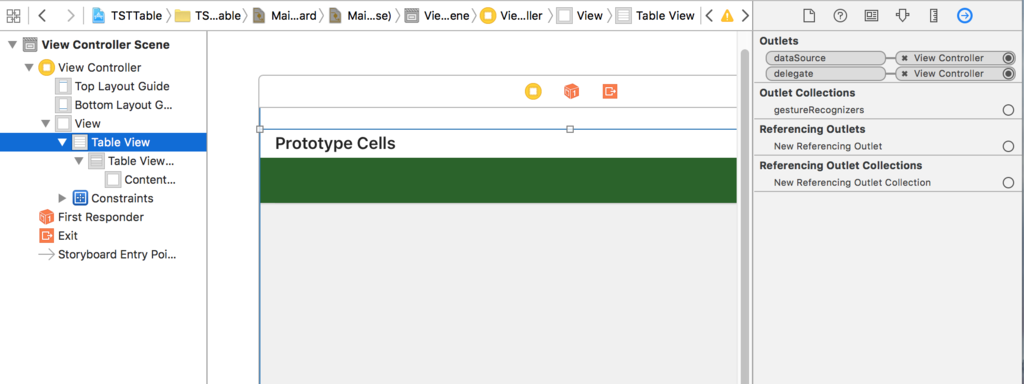
すると、ViewController側ではこのように確認できます。

次に、セルを設定したいと思います。
CellのContentView内に適当に部品を配置していきます。
Cellの高さはドラッグすれば変更できます。

カスタムセルのファイルを追加します。
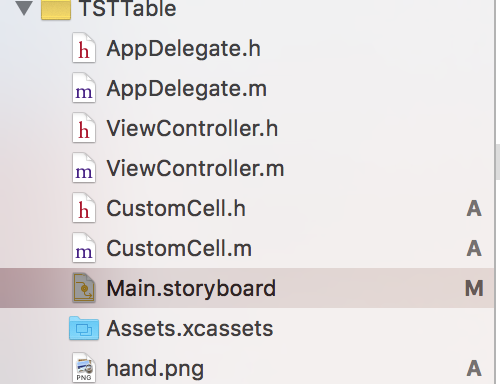
カスタムセルのひも付けを行います。
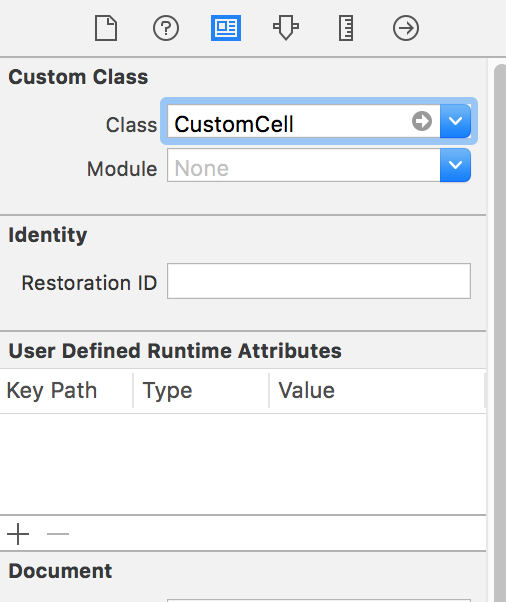
さらに、再利用のためのIdentifierを設定します。

プロパティをコードに接続しておきます。
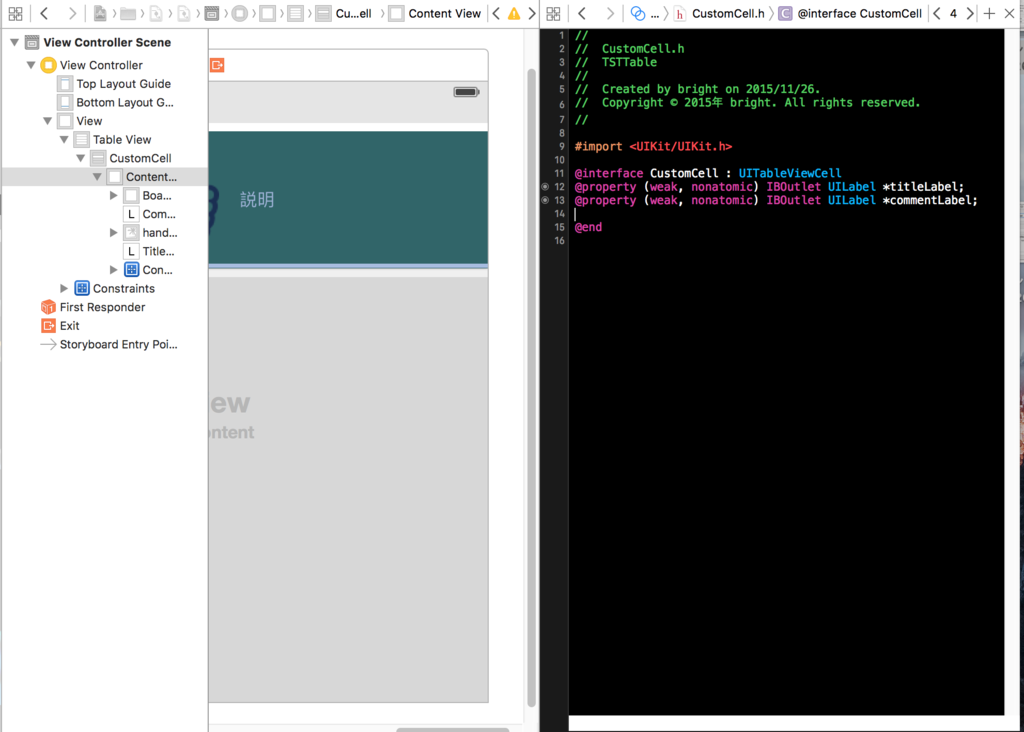
ここからはソースコードになります。
ViewController.h
#import <UIKit/UIKit.h>
@interface ViewController : UIViewController<UITableViewDelegate,UITableViewDataSource>


@end
ViewController.m
#import "ViewController.h"
#import "CustomCell.h"

@interface ViewController ()

@end

@implementation ViewController

- (void)viewDidLoad {
    [super viewDidLoad];
    // Do any additional setup after loading the view, typically from a nib.
}

- (void)didReceiveMemoryWarning {
    [super didReceiveMemoryWarning];
    // Dispose of any resources that can be recreated.
}


- (NSInteger)tableView:(UITableView *)tableView numberOfRowsInSection:(NSInteger)section
{
    return 5;
}

// Row display. Implementers should *always* try to reuse cells by setting each cell's reuseIdentifier and querying for available reusable cells with dequeueReusableCellWithIdentifier:
// Cell gets various attributes set automatically based on table (separators) and data source (accessory views, editing controls)

- (UITableViewCell *)tableView:(UITableView *)tableView cellForRowAtIndexPath:(NSIndexPath *)indexPath
{
    static NSString *CellIdentifier = @"CustomCell";
    CustomCell *cell = (CustomCell*)[tableView dequeueReusableCellWithIdentifier:CellIdentifier forIndexPath:indexPath];

    cell.titleLabel.text = @"グッド";
    cell.commentLabel.text = @"これはイイと言う意味です。";

    return cell;
}
@end
これを実行すると
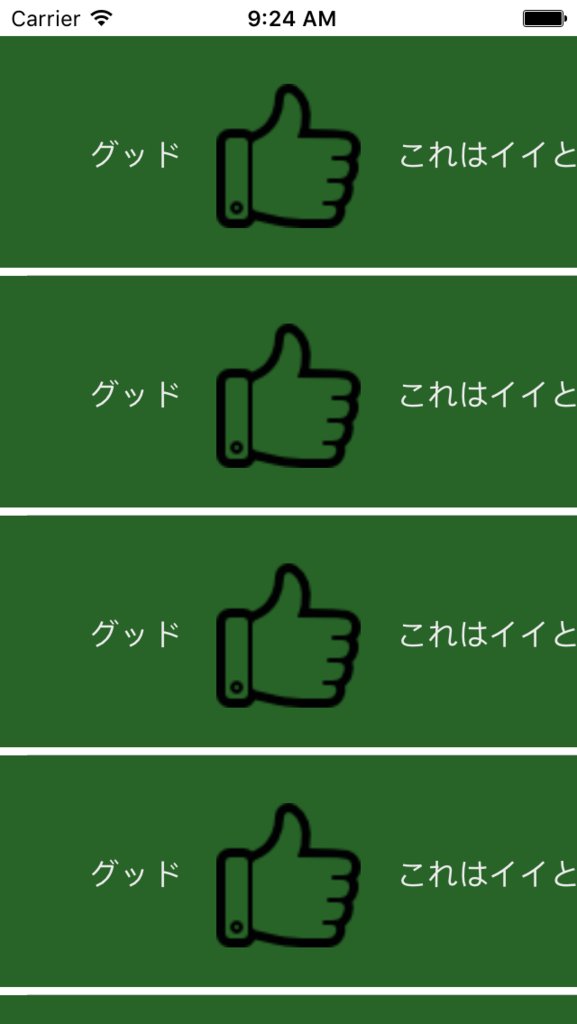
切れてかっこ悪いですが、このようになります。
調整ついでに、TableHeader,TableFooterを付けたいと思います。
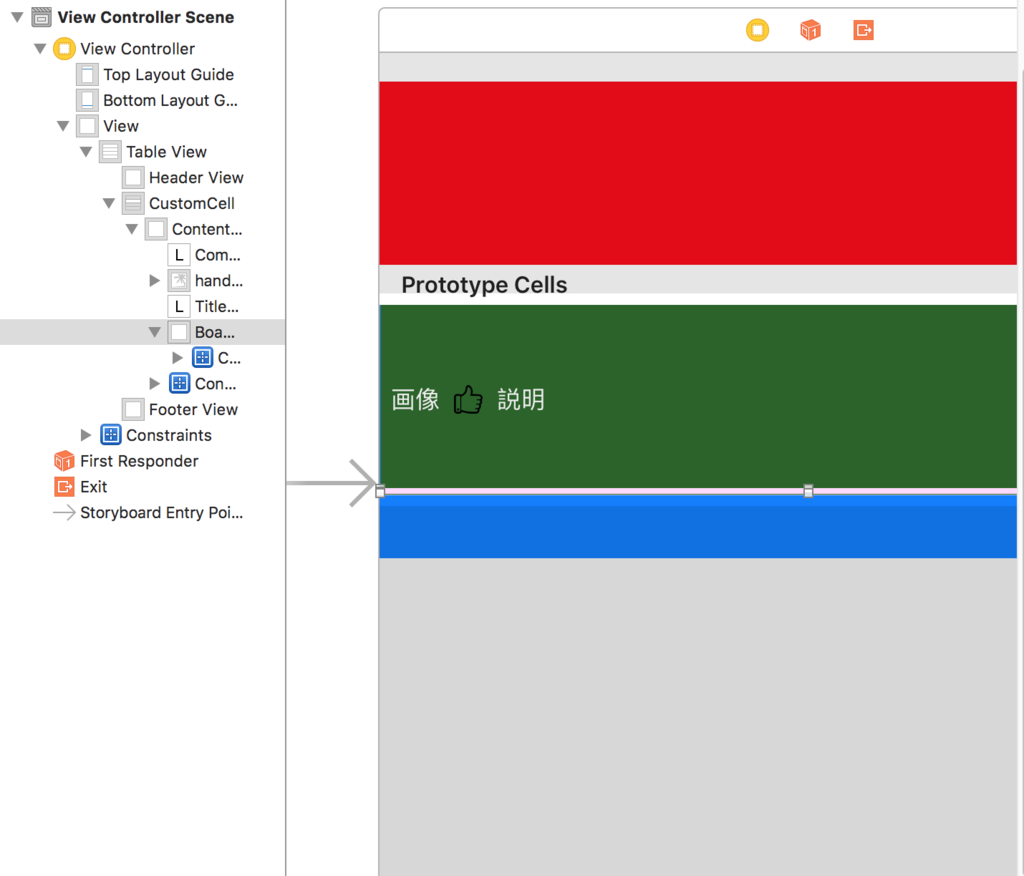
赤がHeaderView,青がFooter View,ピンクがcellのBoarder Viewになります。
Header,FooterはTableViewの中で、Cellの外に配置
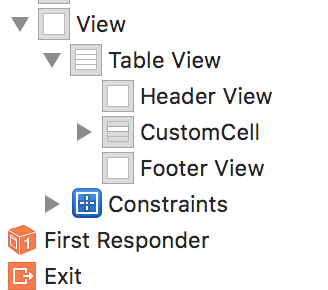
BoaderViewはContentViewの中に配置されていることに注意してください。
Cellの数を2に減らして、実行すると

このようになります。
セルが表示されいないって人はこれをチェックするといいかもです。